
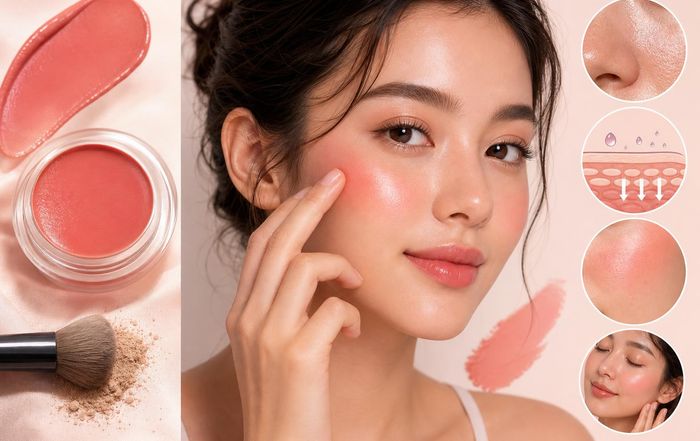
How to Make Cream Blush Last on Combination Skin
Cream blush can look beautifully fresh and skin-like, but on combination skin it often disappears from the cheeks by midday or turns patchy where you're oily. The challenge is getting that dewy, natural finish without sacrificing staying power in both dry and shiny zones. With the right prep, application, and product choices, cream formulas can actually be more flattering and longer-wearing than powders on combination skin.
This guide breaks down why cream blush fades, how to prep different areas of the face, and the best techniques and product types to reach for if you want a soft flush that lasts from morning to night.
Understand Your Combination Skin Before You Apply Anything
Combination skin typically means an oilier T-zone (forehead, nose, chin) with normal to dry cheeks and jawline, but there are many variations. For blush longevity, what matters most is where you get oily and where your makeup tends to break up or cling. If your cheeks are dry but the area closer to the nose gets shiny, a cream formula can slip on the inner cheek while clinging to dry patches further out, making the color look uneven over time.
Dermatologists describe combination skin as having both oiliness and dryness on the same face, often due to differences in sebaceous gland activity and barrier function in different areas. The American Academy of Dermatology notes that oilier zones tend to have more active oil glands, while drier zones may have a more compromised barrier and lose water more quickly, leading to flaking or roughness over the course of the day. Understanding this helps explain why cream blush sometimes grabs in flaky areas or disappears in the spots that get shiny first.
It can be useful to observe your bare skin for a full day: note when your T-zone becomes shiny, whether your cheeks feel tight after cleansing, and where makeup usually breaks up. This "map" should guide how you prep and set your cream blush, because the same product may need slightly different handling on the inner cheek versus the outer cheekbone. If you are building a broader complexion routine, exploring how you balance oil and hydration in general will also improve how all color products wear; you can find more on that in our skincare and routines sections.
Prep: The Base That Makes Cream Blush Last
Long wear starts well before the blush itself. On combination skin, the goal is to create a smooth, lightly hydrated surface on the cheeks without overloading the oilier parts of the face. Overly rich moisturizers can cause cream blush to slide, while under-moisturizing makes it cling to dry patches.
After cleansing with a gentle, non-stripping cleanser (look for options labeled for "normal to combination" or "balanced" skin), apply a lightweight, non-comedogenic moisturizer to the entire face. Gel-cream textures with humectants like glycerin and hyaluronic acid are good options, as they hydrate without leaving a heavy film. The Mayo Clinic and other dermatology sources emphasize that even oily or combination skin benefits from daily moisturizing to maintain barrier function, which in turn helps makeup sit more evenly on the skin.
If your cheeks lean dry, you can add a very thin extra layer of a richer cream only to that area, keeping it away from the sides of the nose and center of the forehead. Allow moisturizer to fully absorb for at least five to ten minutes before moving on. For oilier inner cheeks or around the nose where blush might blend, a targeted, oil-controlling primer can help. Look for silicone-based or mattifying primers containing ingredients like silica or dimethicone, and apply only to areas that get shiny. Avoid heavy, pore-filling primers on the driest parts of the cheeks; they can emphasize texture under cream products.
Sunscreen is non-negotiable, and it can also affect how your cream blush wears. Opt for a lightweight, non-greasy SPF labeled non-comedogenic; many modern formulas are designed to sit well under makeup. The Skin Cancer Foundation and American Academy of Dermatology both recommend broad-spectrum SPF 30 or higher daily; mineral or hybrid sunscreens with a satin finish often pair better with cream formulas than very slippery, oily sunscreens. If your sunscreen leaves a strong sheen, press a tissue gently over your cheeks to remove excess shine before applying complexion products and blush. For more on building a protective base, our wellness and guides and tips sections often cover sun care and barrier support.
Choose the Right Type of Cream Blush for Combination Skin
Not all cream blushes behave the same way. Some are closer to a tinted balm, others feel like a whipped cream, and many newer formulas are cream-to-powder hybrids that dry down more fully. On combination skin, finish and texture matter more than the label on the packaging.
Very emollient, balmy sticks or pots with lots of oils and butters can look beautiful on dry or mature skin but may migrate in oilier zones. For cheeks that are normal to slightly dry with an oily T-zone, these can still work if you apply sparingly and set strategically. However, if your inner cheeks also get shiny, look for formulas marketed as "cream-to-powder," "soft matte," or "longwear cream." These usually contain volatile silicones or lightweight esters that feel creamy at first but then set down to a more budge-resistant finish. Many K-beauty and J-beauty brands, as well as Western brands like NARS, Fenty Beauty, and Rare Beauty, offer these hybrid textures; reading ingredient lists and user reviews on large retailers like Sephora or Cult Beauty can help you identify options that specifically mention long wear on combination or oily skin.
Pigment level also matters. Very sheer, glossy tints often fade quickly, especially if you blend them aggressively or layer over a slippery base. Moderately pigmented creams, which you can sheer out with fingers or a sponge, tend to last better because there is more color left after blending. Look for descriptions like "buildable pigment" rather than "bare wash of color" if longevity is a priority. If you are curious about how these finishes compare to powders and liquids more broadly, our makeup hub often explores formula differences and how they behave on various skin types.
Layering Order: When and Where to Apply Cream Blush
How you layer cream blush with foundation, concealer, and powder can make or break its staying power. On combination skin, placement and order should be deliberate, especially if you powder parts of your face for oil control.
Most cream blushes perform best over liquid or cream foundation that has been allowed to set for a minute or two but not fully powdered. Applying on top of wet, unset foundation can cause the base to move, while applying over heavy powder can lead to patchiness. A useful approach for combination skin is to keep the cheek area slightly dewy while setting only the center of the face first. After foundation and concealer, lightly powder the T-zone and around the nose with a small brush or puff, leaving the main blush area (upper cheek, cheekbone) free of powder for now. This way, the cream blush has a more compatible surface to grip onto, while the oilier regions are already controlled.
If you prefer a very natural, "no foundation" look, applying cream blush on bare skin or over a sheer tinted moisturizer can work well. In that case, ensure your skincare has fully absorbed, and consider using a thin, gripping primer on the areas where your blush will sit. Products marketed as "grip" or "longwear" primers, often containing film-forming agents like acrylates, can help color adhere better; brands like Milk Makeup and NYX offer such primers, and reviews on sites like Ulta Beauty can give you an idea of how they perform on different skin types.
You can also experiment with underpainting: applying cream blush before foundation and then lightly veiling it with a sheer layer of base. This technique can create a subtle, lit-from-within flush that remains visible even if the top layer of blush fades. For combination skin, use a small amount of a slightly more pigmented cream blush than you would normally choose, blend it where you want the color, then apply foundation with a damp sponge, tapping rather than dragging so you do not erase the color. This layered structure often holds up better through oil and sweat, especially when finished with targeted powder.
Application Techniques That Improve Wear and Avoid Patchiness
Technique is as important as product choice. Overworking cream formulas, especially on combination skin, can disturb your base or create streaks that become more obvious as the day goes on. A light, pressing motion tends to be more stable than rubbing or sweeping, regardless of whether you use fingers, a brush, or a sponge.
Fingers warm up the product and can help it melt into the skin, which is ideal for drier cheek areas. The key is to apply with tapping motions, building color gradually. Start with a small amount of blush on the back of your hand, then pick it up with your ring finger and press onto the cheeks, concentrating color where you naturally flush (usually the outer cheek moving toward the temple). Avoid rubbing back and forth, particularly near the sides of the nose where your base may be more prone to movement because of oil. If your fingertips are naturally very warm or your skin is very oily, you may find that brushes or sponges disturb the base less.
Dense, synthetic blush brushes are excellent for cream formulas. Opt for a medium-sized, rounded brush and use a stippling or tapping motion rather than buffing. Pick up a small amount of product, dab it on the cheek, then tap and roll the brush to blend edges. This allows you to build intensity without disturbing foundation underneath. A slightly damp beauty sponge can also be helpful for combination skin because it absorbs excess emollients while pressing pigment into the skin. Use the side of the sponge to tap blush into place, then the clean edge to diffuse any harsh lines. Many professional artists discuss these techniques in tutorials on platforms like Lisa Eldridge's YouTube channel, which can be a useful visual reference.
If patchiness is a recurring issue, especially where your cheeks are drier, it may help to gently exfoliate once or twice a week using a mild chemical exfoliant like lactic acid or polyhydroxy acids. Over-exfoliation, however, can worsen sensitivity and dryness, so dermatology sources such as the Cleveland Clinic advise limiting strong exfoliants and focusing on barrier-friendly ingredients like ceramides and niacinamide. Addressing underlying texture will allow cream products to glide and adhere more evenly, which in turn improves wear time.
Strategic Setting: Locking Cream Blush in Place Without Losing the Glow
Setting cream blush on combination skin is a balancing act: too much powder can make it look chalky or emphasize texture, while too little allows oil to break it down. The solution is usually targeted and minimal setting, with textures chosen to match your desired finish.
One reliable method is to use a translucent, finely milled loose powder and a small, soft brush. After applying and blending your cream blush, wait a minute for it to start settling, then lightly tap powder only on the areas where you tend to get shiny or where your hair might rub against your cheeks. Focus on the inner cheek closer to the nose and the lower edge of the blush; leave the highest point of the cheekbone slightly more luminous. Press the powder in rather than sweeping to avoid lifting color. Many makeup artists recommend powders that are silica-based and talc-free for a smoother, less cakey finish, but the best choice depends on your sensitivity and preferences; testing a few minis or travel sizes can help you find a good match.
Another technique that works well on combination skin is to layer a very sheer amount of powder blush over your cream. This "blush sandwich" can significantly extend wear without requiring heavy powdering of the entire cheek. Choose a powder blush in a similar shade and finish, pick up a tiny amount on a fluffy brush, tap off the excess, and lightly veil it over the cream. This creates a soft-focus finish that resists oil and sweat more effectively. If you prefer to maintain a dewy look, focus the powder blush on the center of the color and keep the outer edges cream-only to retain a skin-like sheen.
Setting sprays can also help, but not all are created equal. Hydrating mists may refresh makeup but do little for longevity. Look for formulas labeled "longwear," "transfer-resistant," or "oil control." Products like Urban Decay All Nighter and Charlotte Tilbury Airbrush Flawless Setting Spray are widely referenced in beauty communities and reviewed by outlets such as Allure and Byrdie for their ability to lock makeup in place. To avoid disrupting your blush, hold the spray at least an arm's length away and mist in an "X" and "T" pattern, letting it dry completely before touching your face. For more on how setting techniques interact with different formulas, our trends and beauty sections often break down newer product innovations and how they perform in real-world routines.
Midday Touch-Ups That Don't Disturb Your Base
Even with good prep and setting, combination skin can change throughout the day as oil production and hydration levels shift. Thoughtful touch-ups can refresh your blush without turning it cakey or patchy. The key is to manage oil first, then add color only where needed.
If your T-zone or inner cheeks become shiny, use blotting papers or a thin tissue to gently press away excess oil. The American Academy of Dermatology notes that blotting papers can reduce shine without stripping skin or removing as much makeup as frequent washing. Press, hold, and lift; avoid rubbing. Once shine is under control, assess whether your blush has faded or just lost a bit of definition. If the color is mostly intact but looks slightly dull, a light mist of setting spray can revive the finish without adding more product.
When you do need to reapply blush, choose a formula that layers well. Many stick or compact cream blushes are designed for on-the-go use, and some brands offer multitasking lip-and-cheek sticks that are perfect for touch-ups. Apply a very small amount with clean fingers, tapping only on the high points of the cheek, and blend outward. Avoid reapplying too close to the nose, where foundation is more likely to have worn away; adding more pigment there can highlight uneven texture or separation. If your skin feels particularly oily, you might find that a light dusting of powder blush instead of more cream gives a fresher, less heavy look in the afternoon.
For those who spend long days in air-conditioned offices or heated environments, cheeks may actually dry out over time. In that case, cream blush can start to look patchy or clingy. A hydrating mist with humectants like glycerin or panthenol, lightly spritzed and allowed to settle before gently tapping the cheeks, can soften the look of the blush and allow for smoother reapplication. Just be cautious not to over-mist, as too much moisture can cause makeup to break apart. If you are interested in building a full day-to-night routine that considers these environmental shifts, our health and fitness and food and nutrition sections also touch on lifestyle factors that influence skin balance over time.
Ingredients and Formula Features That Help or Hinder Longevity
Looking at ingredient lists can feel intimidating, but a few patterns are useful when choosing cream blush for combination skin. Formulas that rely heavily on occlusive oils, waxes, and butters (such as petrolatum, shea butter, cocoa butter, and certain heavy plant oils) tend to feel richer and may be better suited to dry or mature skin. While they can still work on combination skin in moderation, they may migrate more in oilier areas or feel too heavy in hot climates.
By contrast, formulas that list lightweight esters and silicones (such as isododecane, dimethicone, cyclopentasiloxane) high in the ingredient list often feel thin and silky, then set to a more budge-resistant finish. Many longwear cream and liquid blushes use these to create a flexible film on the skin. The Environmental Working Group's Skin Deep database and resources from the Personal Care Products Council can help you understand what these ingredients do, though it is important to remember that "chemical" does not equal "bad"; many of these are well-established, safe cosmetic ingredients when used as intended.
If you are acne-prone in the cheek area, it is worth checking that your cream blush is labeled non-comedogenic and avoiding very heavy, fragranced formulas. While comedogenicity scales are not perfect and individual reactions vary, dermatologists such as those at Mount Sinai often suggest avoiding products that combine multiple high-risk ingredients (like isopropyl myristate, certain algae extracts, and heavy oils) if you notice consistent breakouts where you apply blush. Patch testing a new cream blush on a small area for several days before daily, full-cheek use can help you catch potential issues early.
On the positive side, some modern cream blushes incorporate skincare-adjacent ingredients like squalane, hyaluronic acid, and niacinamide. While the blush step alone will not replace your core skincare, these additions can make formulas more comfortable and compatible with combination skin by supporting hydration and barrier function. When paired with a balanced skincare routine and thoughtful application, they can contribute to a smoother surface that holds color more evenly and for longer.
Putting It All Together: A Simple, Long-Wearing Cream Blush Routine
For readers who want a straightforward, repeatable process, it can help to think in steps rather than individual tips. After cleansing, apply a lightweight moisturizer all over and a slightly richer cream only on dry cheek areas if needed. Follow with a non-greasy, broad-spectrum SPF, then add a targeted mattifying primer on the T-zone and inner cheeks where you tend to get shiny. Apply your foundation or tinted moisturizer, then lightly set only the center of the face with a translucent powder, leaving the main blush area dewy.
Choose a moderately pigmented, cream-to-powder or soft-matte blush, and apply using fingers or a brush in tapping motions, starting with a small amount and building until you reach your desired intensity. Allow the blush to sit for a minute, then gently set the inner cheek and lower edges with a fine loose powder, or add a whisper of coordinating powder blush for extra longevity. Finish with a longwear setting spray, misted from a distance. Throughout the day, manage shine with blotting papers before any touch-ups, and refresh color with a light hand, focusing on the high points of the cheeks rather than reworking the entire area.
With this kind of routine, cream blush becomes less of a gamble on combination skin and more of a reliable way to achieve a soft, natural flush that complements both drier and oilier areas. As with any makeup technique, some experimentation is inevitable, but understanding how your skin behaves and how formulas interact with oil, hydration, and texture will make each adjustment more effective. Over time, you can refine your approach-whether that means switching to a different finish, adjusting where you powder, or changing application tools-until your cream blush lasts as long as the rest of your look.
